Support

5 Support Entries

Problem:

First operation feeds the stripes too early into the upper magnetic belt of 2. table. Therefore the stripes do not stop on the upper magnetic belt and will be ejected through the slot in the frame of the 2. table.

Possible Causes & Resolutions:

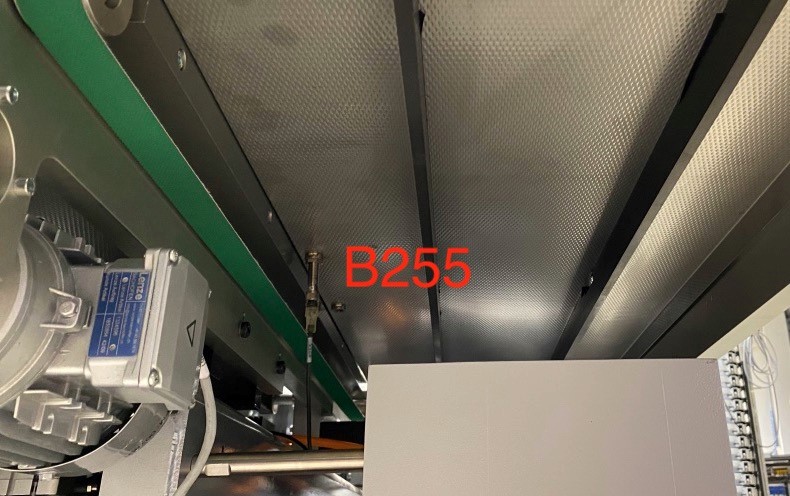
Sensor B255: This sensor sends a signal to the control that the upper magnetic belt is ready for new stripes. The sensor might be defect or wrong adjusted.

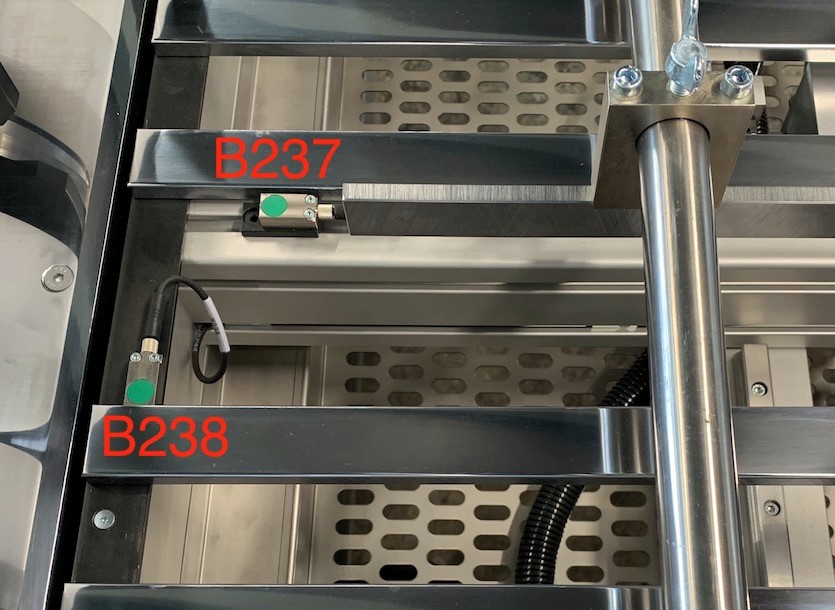
Sensors B237 and B238: Sensor B237 does slow down the sheets and B238 stops the sheets for the centering. If the sheets do not stop, they may run through the first operation without being centered and with incorrect timing. The sensors might be defect or wrong adjusted.


Possible cause:

  • too many braking magnets
    => reduce the amount of magnets

NOTE:
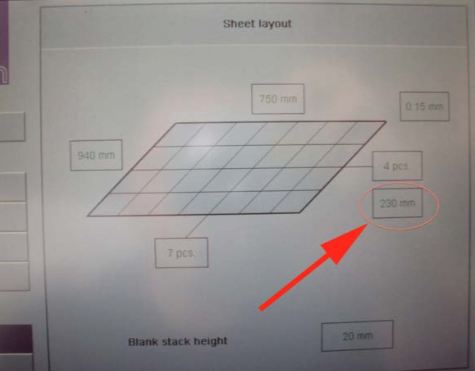
If you have too few magnets, it might cause angularity problems!


Damages at the front edge:

  • the spring load at the catch might be too high
    => reduce spring load (see picture).


  • lateral guide (see picture – in red) might be too close
    => increase the distance “X” slightly.

NOTE:
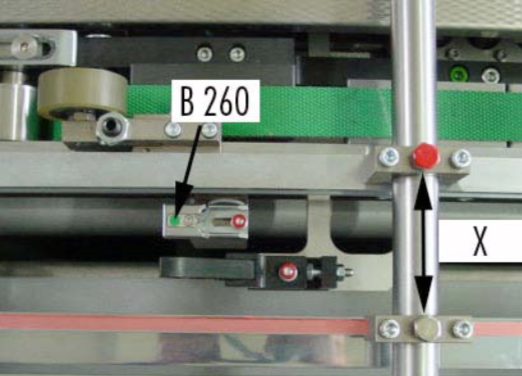
Do not loosen the red marked screw. The standard setting for top guide should be approx. X = 72 mm.


Possible causes:

Make sure that the lateral, adjustable top guides (picture) are set correctly in lateral position as well as in height. They shall guide and hold the stripes as flat as possible over both sensors B260 and B261. Both sensors need to be reached at same time, otherwise the error will occur.


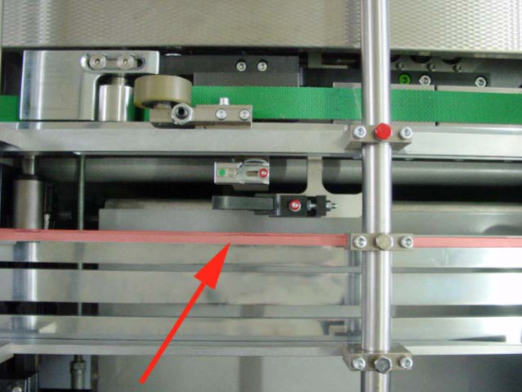
If the lateral guide is too far away from the sensor, the sheet might bulge. Therefore move the lateral guide closer to the sensor.

NOTE:
Do not loosen the screw marked red. The standard setting for top guide should be approx. X = 72 mm.


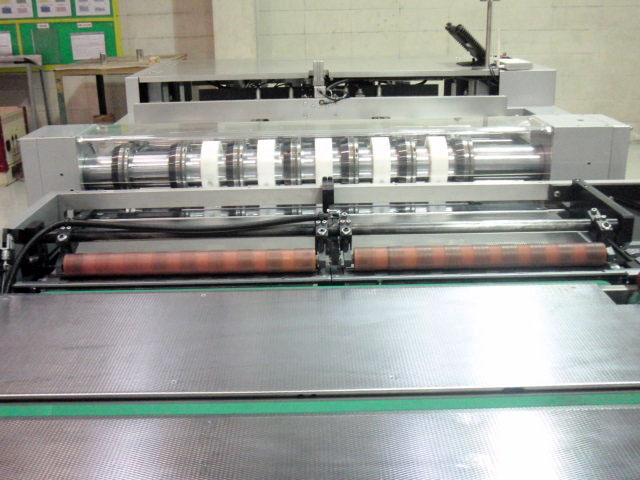
– Make sure that pressing rolls are adjusted correctly (picture).

– Check the movements of the sheet, they might get stuck somewhere.


  • Strip height is set wrong. Then the belt in front of the second operation is running too fast or too slow. This can create a problem with strip feeder LinMot.

Possible causes:

  • Responsible for having all stripes correctly aligned after first operation, are both rubber shafts.
  • Each rubber shaft has a left and right support, and each support is under pressure by a pressure spring.
  • If the setting of the springs is not correct, some stripes may stop earlier or later than other stripes:
    • Increase or reduce the tension on the springs, till you get a satisfying result.
  • If this still does not solve the problem, a complete resetting of both rubber shafts is necessary:
    • Reduce the tension of all four screws completely.
    • Release the air pressure by switching off the main air supply.
    • Both rubber shafts have to touch the lower rollers completely.
    • If, for instance, the left side of one rubber shaft does not touch the lower roller, do the following:
      • Slightly undo the M8 of the main support, till the rubber shaft goes down automatically, then lock the screw again.
    • Start to tighten the pin screw (for spring pressure tension) till each screw does touch the spring.
    • Turn every pin screw between 2-3 revolution, but all the same!
    • When you move the piston rod of the pneumatic cylinder completely in by hand, the rubber rollers must of course touch the lower roller, and you must see the springs get compressed further.
    • Switch the main air pressure supply back on.


Possible cause:

  • The reed sensor B233 on the vertical cylinder rear/right corner is not correctly adjusted.
    • when piston of cylinder remains in bottom position (due to blank magazine clearing process), the reed switch must be active


All Can Man content is now also available on the Soudronic Group website.
Where do you want to continue your journey?
All Can Man content is now also available on the Soudronic Group website.
Where do you want to continue your journey?