Possible causes:
Download PDF here
Possible cause/checklist:
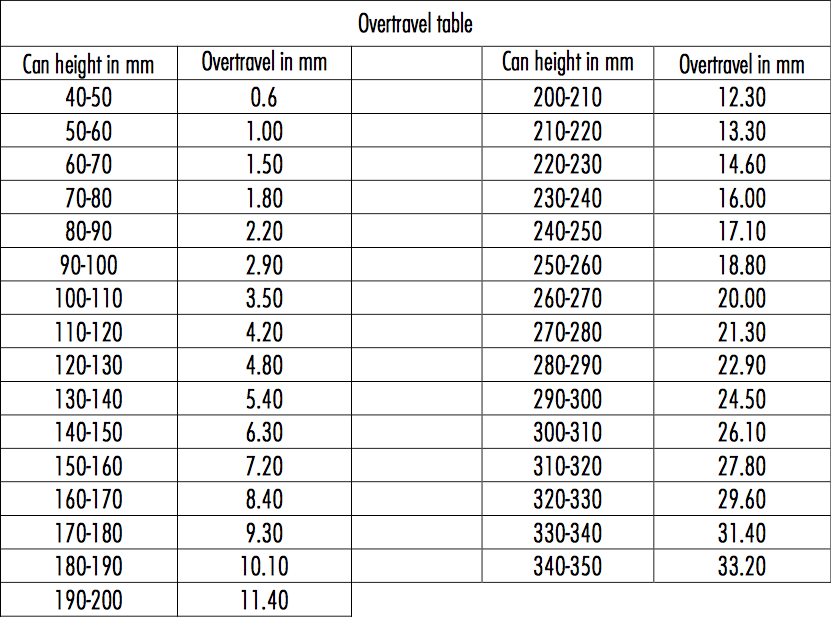
The recipe helps to adapt the speed of the incoming can into welding roller and the actual welding speed. In the best case, those speeds are equal.
Below you find a table of this recipe in steps of 10 mm can height.
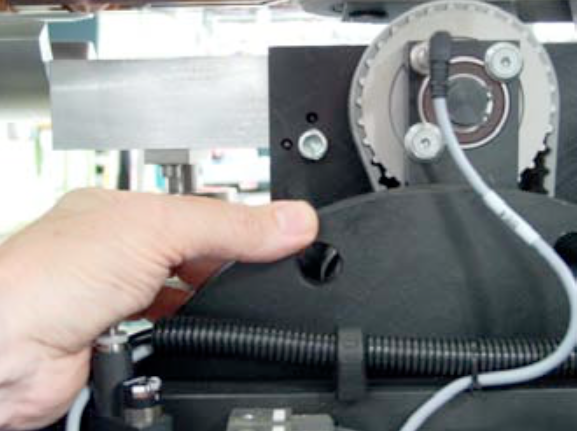
Turn the wheel of the synchrostar, that the pusher finger is as close as possible to the welding roll.
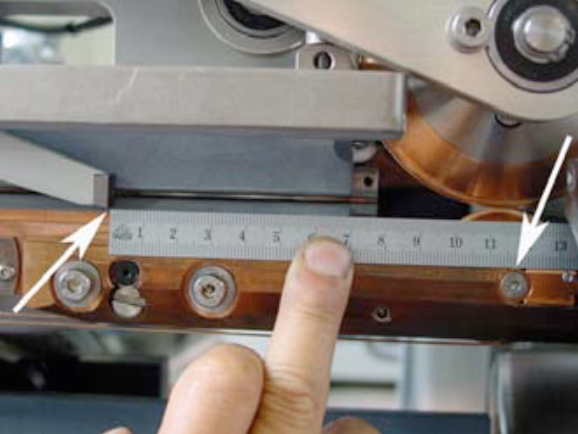
Measure now the distance from the top of the pusher finger to the center of the welding roll.
Distance = Can height – Overtravel Example:
Canheight: 122mm Overtravel: 4.8 mm
Distance: 117.2 mm
Possible cause:
Possible causes:
The recipe helps to adapt the speed of the incoming can into welding roller and the actual welding speed. In the best case, those speeds are equal.
Below you find a table of this recipe in steps of 10 mm in can height.
Turn the wheel of the synchrostar, so that the pusher finger is as close to the welding roll as possible .
Now measure the distance from the top of the pusher finger to the center of the welding roll.
Distance = Can height – Overtravel
Example:
Can-height: 122 mm, Over-travel: 4.8 mm
Distance: 117.2 mm
